Along with project management and branding, invoicing is one of the most essential tasks for any graphic designer to scale their business and receive prompt payment. While making invoices on Google sheets and Google Docs from scratch is a common invoicing method, it takes extra time and often leaves creative freelancers with unpaid invoices, overdue invoices, or missed invoice details.
If you want to do it all in your freelance business without sacrificing quality, time, and your personal brand, consider using an online invoicing software to simplify the administrative work for you. In this article, we will outline the core pillars of a graphic designer invoice and the 4 steps to creating a professional invoice that’s branded.
1. Choose Your Designer Invoice
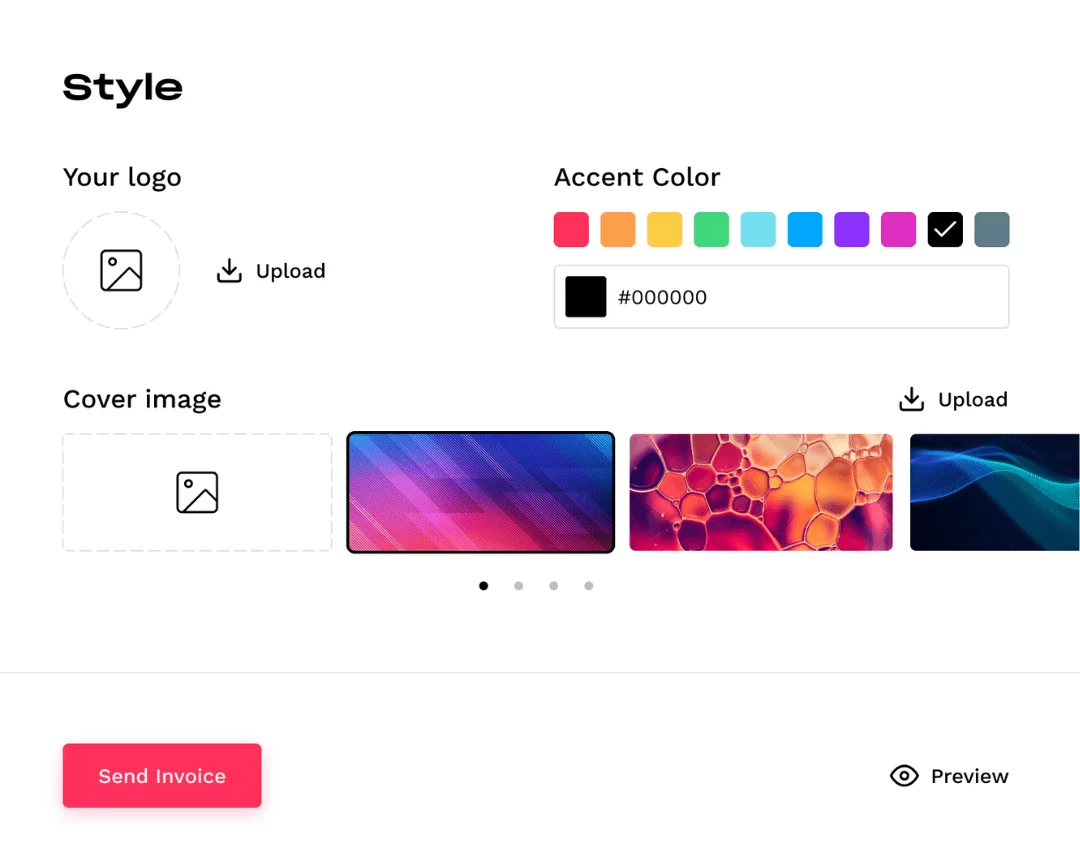
You can’t underestimate the power of a good impression and your brand is an essential part of building and maintaining trust with clients. If the invoice is the last touch point with your client, make it memorable. With the free invoice generator, you can showcase your brand by uploading your logo and choosing a cover image with your brand’s color scheme.
2. Enter the payment details
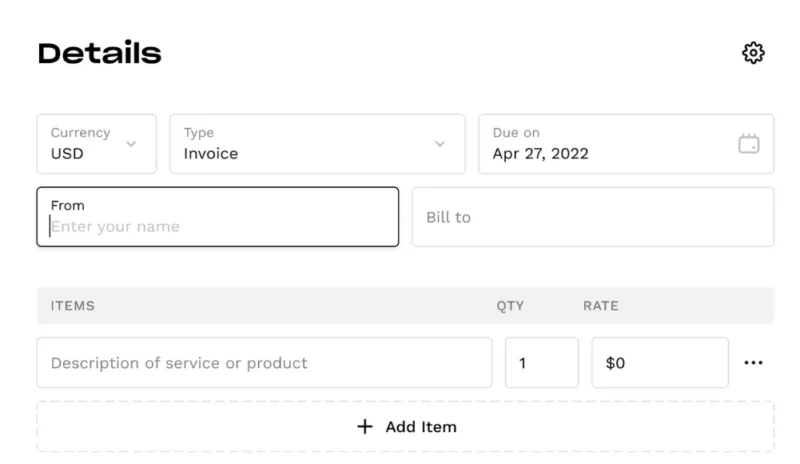
After customizing your invoice design, simply add your contact details including your name and email, billing address, client name and email address, and due date. You can choose the currency and add an invoice, PO, or VAT number. Next, type in the description of each service offered, along with a description, quantity, and rate. If you have additional payment terms like sales tax, you can enter that as well.
3. Choose payment methods
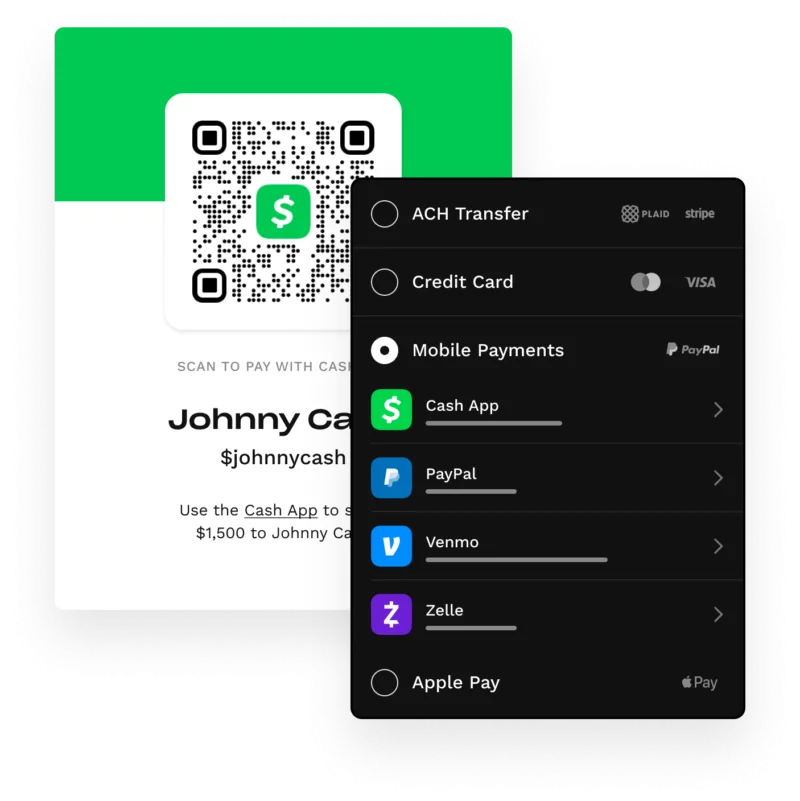
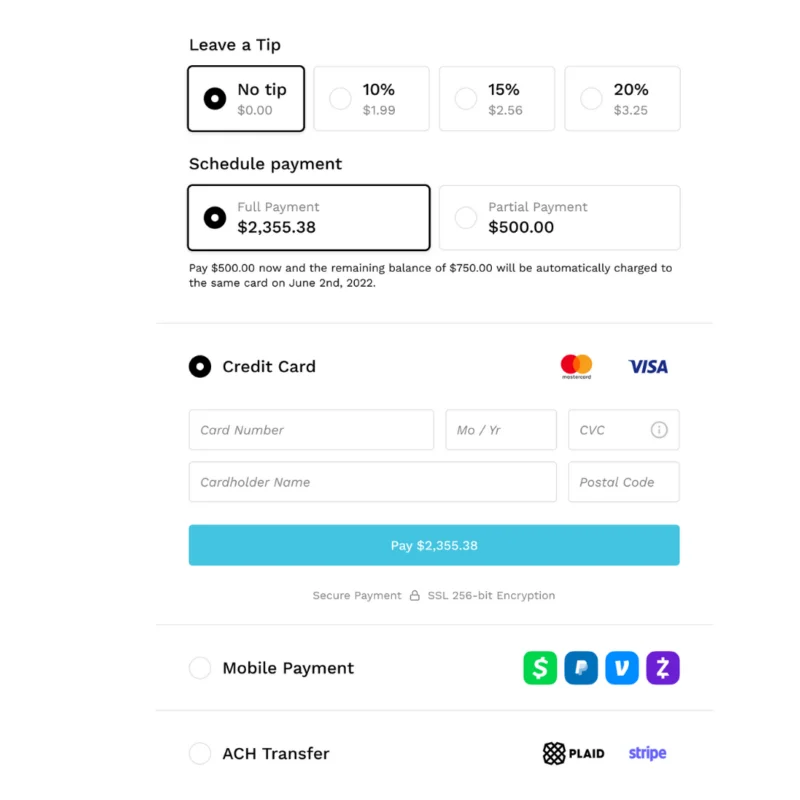
After making sure the details are accurate and self-auditing your invoice, you can select the online payments you would like to accept. The online invoice generator is integrated with CashApp, Venmo, Paypal, and Zelle. By offering multiple online payment options, clients have a higher chance of following through with the payment instead of prolonging transactions because of limited payment methods.
4. Download and send
Once created, these branded documents are instantly available for download so that all clients need to do is sign off on the invoice before payment gets sent directly from their bank account into yours. Before sending your beautiful invoice, make sure to add a personalized message in the notes section. Before sending your beautiful invoice, make sure to add a personalized message in the notes section. It’s important to double check the essential elements like bank details, accurate client info, rate per hour, and payment due date. A live preview on the right hand side of the invoice generator will ensure no detail is missed. You can email your online invoice, download a PDF copy, or send your client a link to the invoice. The client can download or print the invoice from the link.
Need help with invoice emails? Learn How To Write An Invoice Email — Free Email Templates
Create unlimited invoices with the invoice maker today.
Advanced Invoicing Features
Bloom’s advanced invoicing features, you can do more than create a branded invoice. Explore more online payment options, invoice templates, and add contracts. Here are the additional invoicing features you can unlock by creating an account for free with Bloom.
1. Save templates
As a designer, you will have repeat services and similar invoices and quotes sent to clients. Instead of manually making an invoice from scratch for every design client, you can customize templates for packages to make invoices in minutes. Save templates to use for repeat services.
2. Connect Square, Stripe and ACH payments
High credit card processing fees are one of the reasons freelancers resort to unprofessional cash or check payments. However, not all payment processing platforms are created equal. Payment processors like Stripe make payment transactions secure with a low fee. Instead of paying the standard 2.9% credit card fee, use ACH and only pay 0.8% capped at $5 per transaction. In other words, you can receive secure payments between bank accounts without paying high processing fees.
Read more about payment processing fees here.
3. Add a retainer
Creating and sending an invoice when your client books is a sure way of receiving a signed contract, retainer, or full payment in minutes. At the least, having the client pay the retainer right away secures the client’s booking in your calendar and prevents last minute cancelations and double bookings.
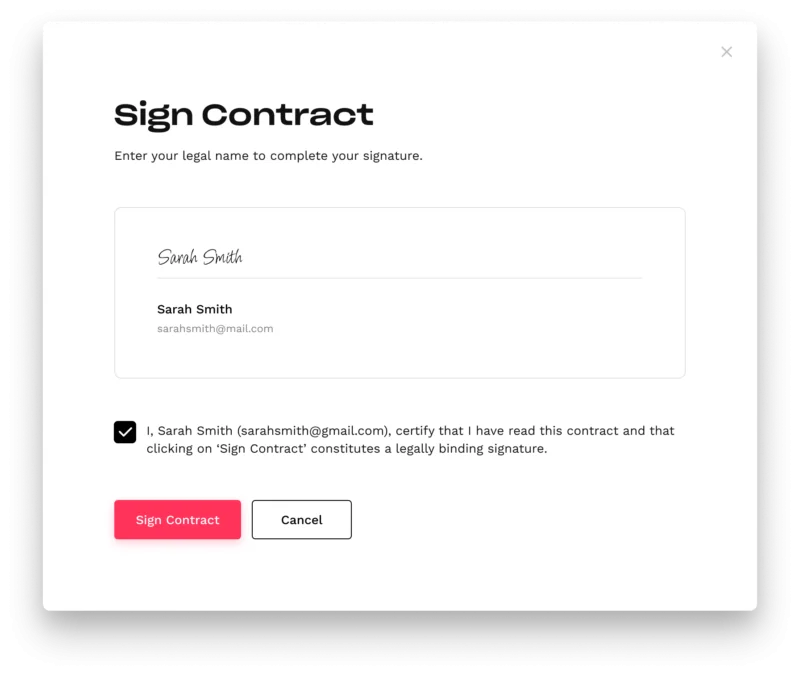
4. Add contract to invoice
Legally binding contracts are a big deal, and waiting for a client to sign one can prolong the booking and payment process. Your clients should be aware of your payment policy to avoid delayed payments. Instead of using a separate tool for signing contracts, add a digital contract to your invoice. Enable auto-countersign, use contract templates, and include custom project variables to make contracts the easiest part of booking.
5. Setup payment reminders and payment schedule
Late payments are no bueno, and you can really strain your income. By using Bloom invoicing, you can setup automated payment reminders, track payments, and easily access payment records for all your clients.
If your client needs to request any changes or add-on services, you can easily adjust the digital invoice. When reminding clients of payment deadlines, avoid sending back and forth emails and set up automated payment reminders instead.
6. Dedicated payment page
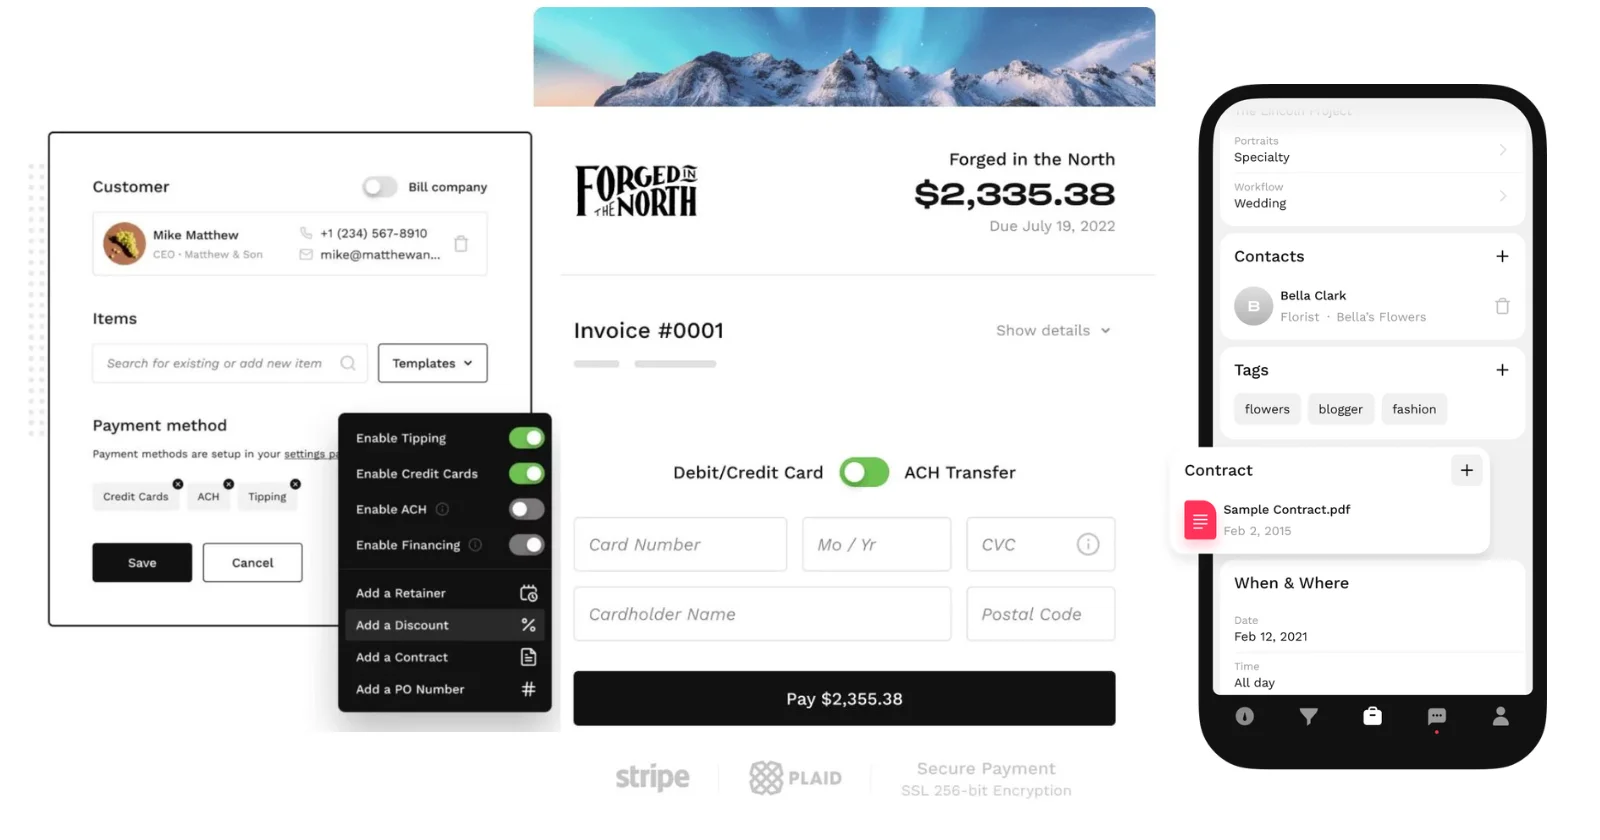
When you send your detailed invoice or quote, your client will see a dedicated modern payment page. This is a beautiful presentation of your brand and the entire invoice that can be downloaded in PDF.
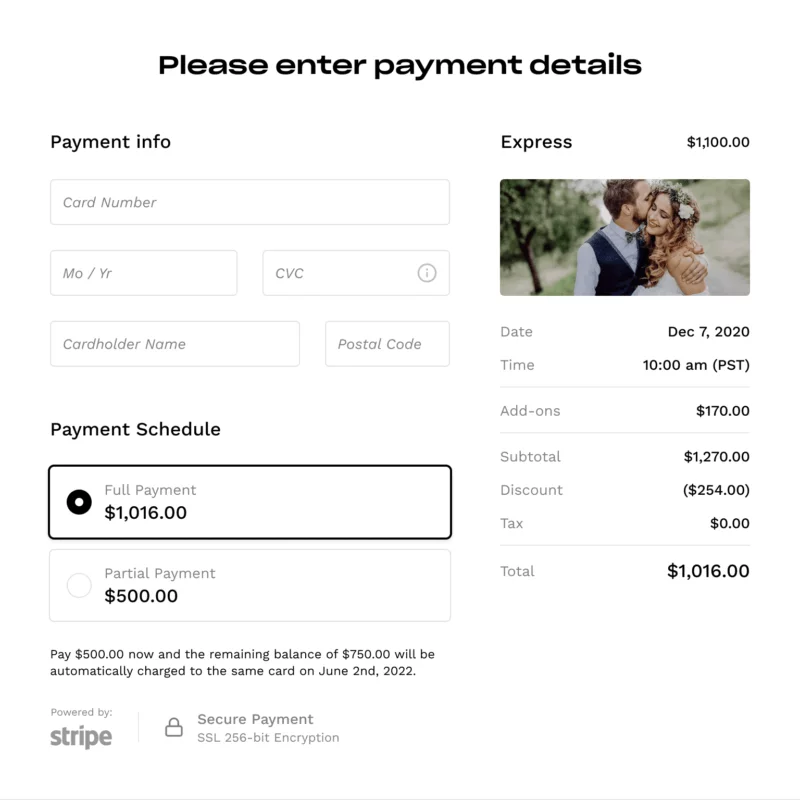
The client can pay with their chosen secure method and save the receipt for their records. A clean design makes it easy to navigate the payment process from adding a contract to collecting payments. All contracts can be viewed and signed on the payment page.
Conclusion
You don’t need advanced accounting software to create a beautiful invoice, and you shouldn’t have to chase clients for payment. Spend less time figuring out the invoicing process and more of it actually getting paid using a graphic design invoice template. Bloom’s sleek and intuitive platform helps you make creative invoices in minutes. Take care of all payment-related tasks in a single place. Bloom also has additional features for graphic designers to manage projects and organize your graphic design business including a client portal, project proposals, scheduling and booking.
All of these invoicing features are free. Create a free Bloom account to get started.